

Verified Credentials & Portfolio
Course certifications backed by real practical assignment submissions and AI evaluations.
Level: beginner • Issued on Aug 10, 2026
Verified Practical Capstones & Submissions (5)
1. Configuring Essential Settings
Configure your CapCut settings as demonstrated in the video.

How I Configure My CapCut Settings 1. I open CapCut and create a new project. 2. I go to Settings by tapping the gear icon. 3. I adjust the video quality settings to ensure I get the best possible output. 4. I enable high-quality export options where available. 5. I set my preferred frame rate, depending on the type of video I’m editing. 6. I choose the appropriate resolution, preferably 1080p or higher when my original footage supports it. 7. I make sure HDR is enabled if my footage was recorded in HDR. 8. I check my export settings before saving the final video. 9. I select the highest suitable quality/bitrate to keep my video sharp and clear. 10. I export my video and review the final result to make sure the quality matches what I want
- The student correctly identified several key export parameters visible in the demonstration, including frame rate, resolution, bitrate, and HDR settings.
- The submission demonstrates an understanding of the general concept of optimizing video output quality through these settings.
"The submission partially addresses the assignment by identifying some core export settings. However, it lacks specificity in describing the configurations as directly demonstrated in the provided visual aid. Several key configurable options were omitted, and the inclusion of general workflow steps detracted from the focus on precise setting adjustments."
2. CapCut Overview
Download the media and explore the CapCut interface using the files.
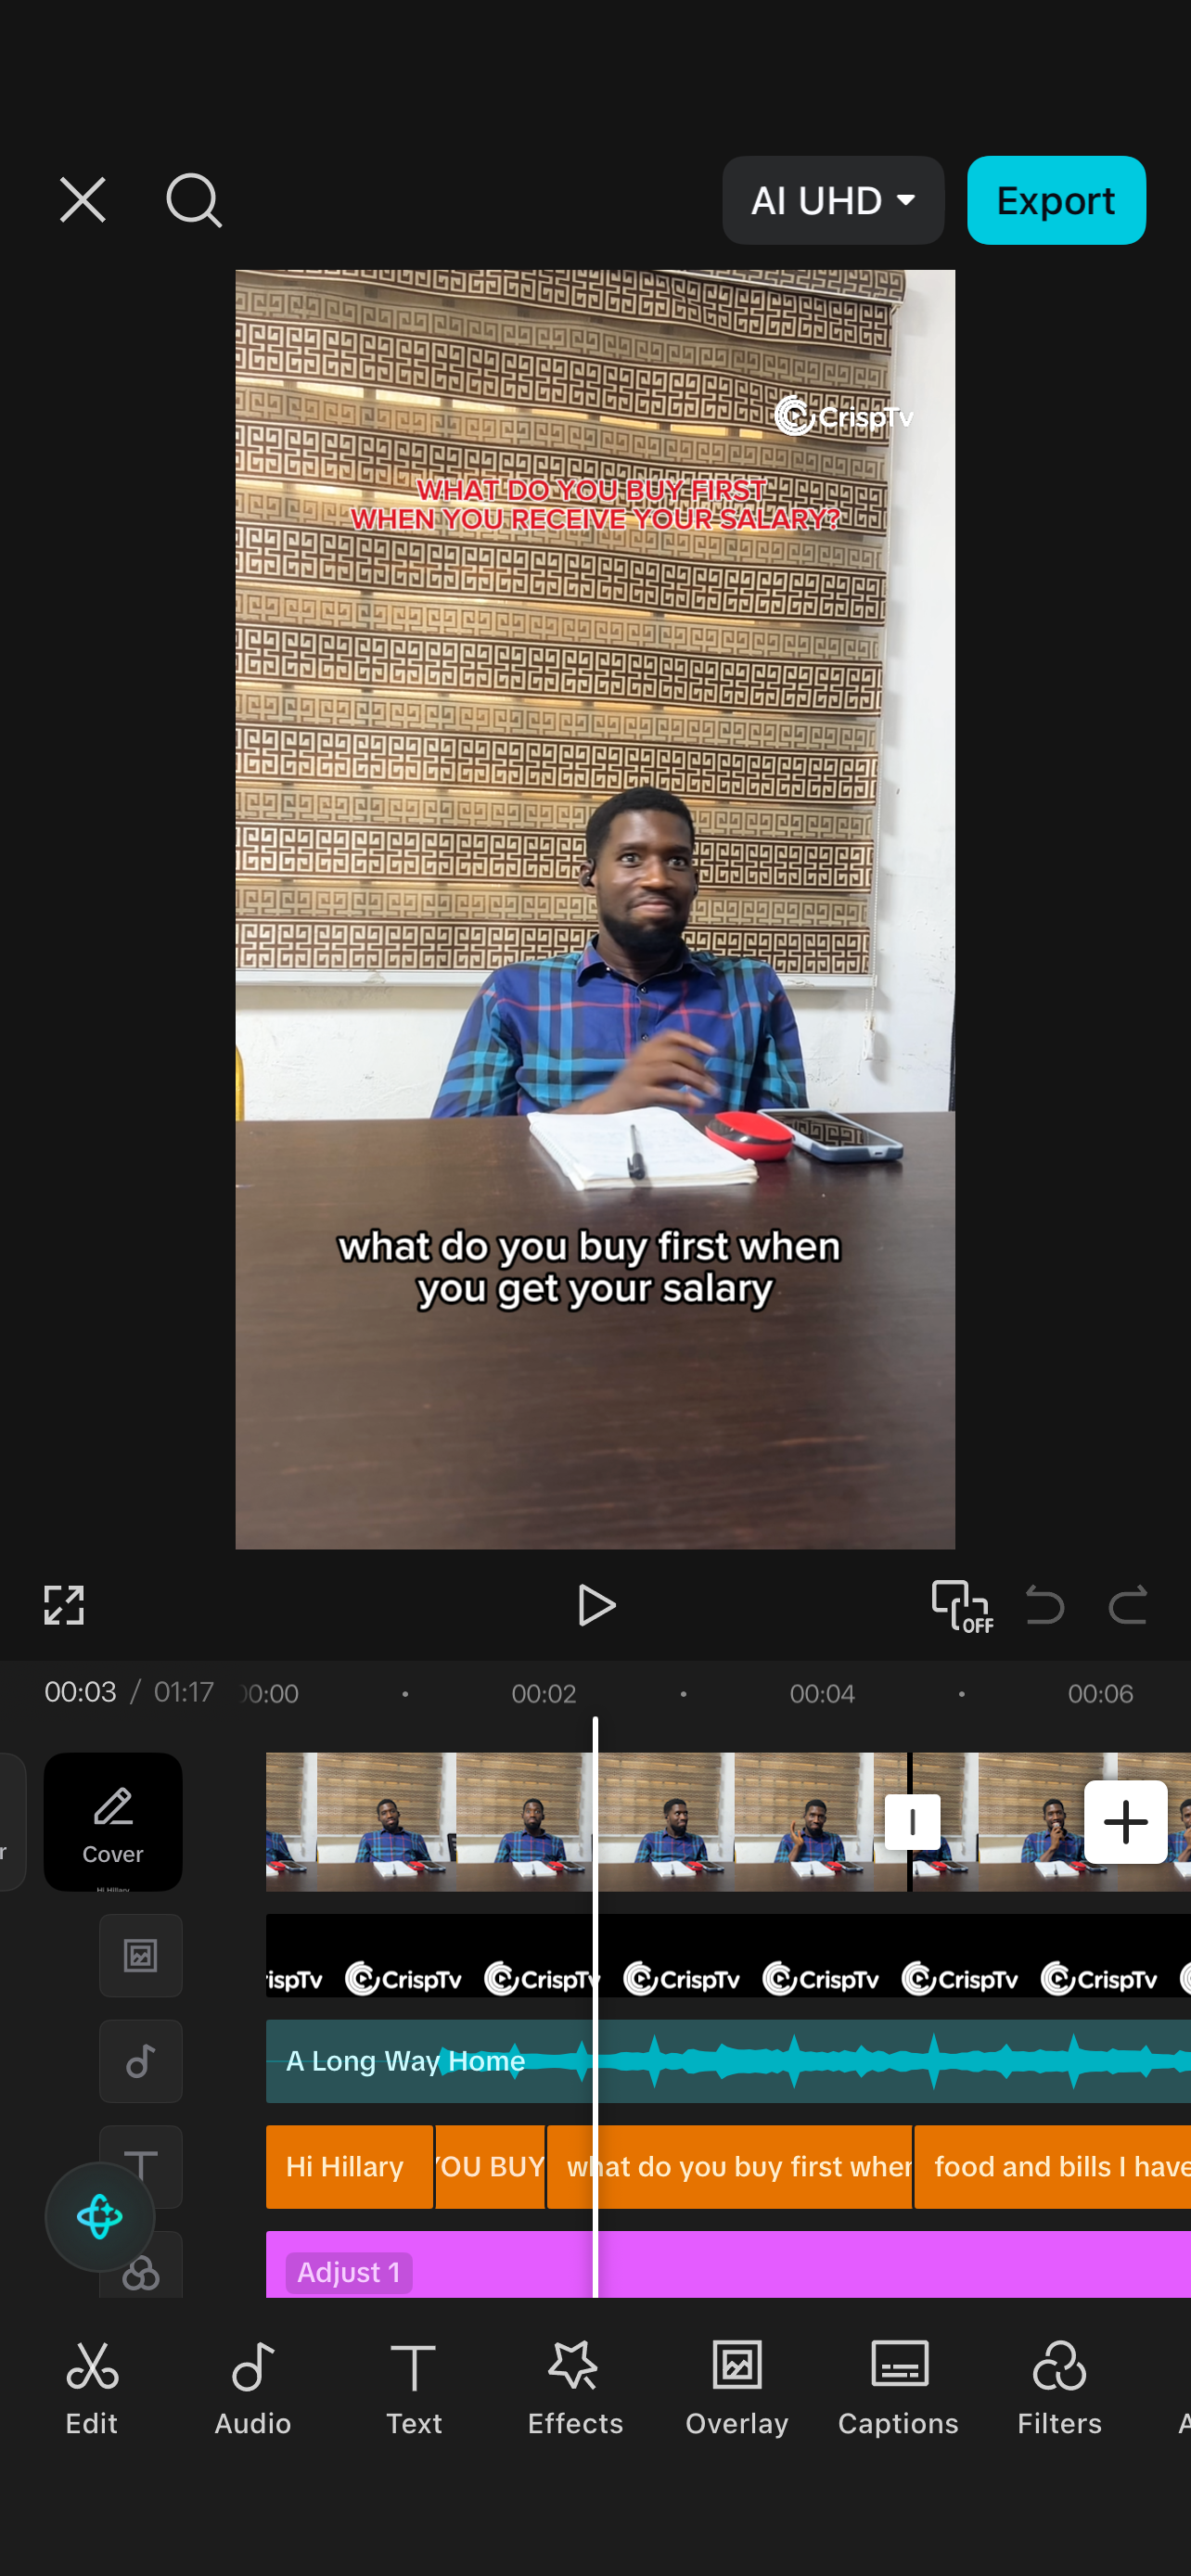
How i downloaded and explore my CapCut interface A. Download the Media Files 1. I opened the platform where the files were sent. 2. I located the video, images, and audio files I needed. 3. I tapped Download or Save to Device. 4. I made sure all the files had finished downloading before opening CapCut. B. Open CapCut 1. I opened the CapCut app. 2. On the home screen, I tapped New Project. 3. CapCut opened my device’s media library. 4. I selected the videos and images I had downloaded. 5. I tapped Add to import them into my project. C. Explore the CapCut Interface I explored the following sections of the CapCut interface: 1. Preview Window The Preview Window is the large area at the top of the interface. I: * Viewed my video in the Preview Window. * Tapped Play to preview my video. * Dragged through the video to check different moments. 2. Timeline The Timeline is the section underneath the Preview Window. It contains: * Video clips * Images * Audio/music * Text * Effects * Stickers I tapped a clip to select it and practiced moving, trimming, splitting, and editing it. 3. Editing Toolbar When I selected a video clip, I explored tools such as: * Split – cuts the clip into two sections. * Trim – shortens the beginning or end of a clip. * Speed – makes the video faster or slower. * Volume – adjusts the audio level. * Animation – adds entrance, exit, and motion effects. * Filters – changes the visual appearance of the video. * Adjust – allows me to change brightness, contrast, saturation, and other settings. * Delete – removes the selected clip. 4. Audio I tapped Audio to explore options for adding: * Music * Sound effects * Voiceovers * Sounds available on CapCut 5. Text I tapped Text to explore how to: * Add captions * Add titles * Change fonts * Change text colour * Add text animations * Create auto captions 6. Effects I tapped Effects to explore: * Video effects * Body effects * Other visual effects 7. Overlay I explored the Overlay feature, which allows me to place another video or image on top of my main video. I learned that overlays can be used for: * Logos * Watermarks * B-roll * Picture-in-picture videos D. Explore the Downloaded Media To practice using the CapCut interface, I: 1. Imported one video. 2. Imported one image. 3. Added both to the timeline. 4. Tapped the video to select it. 5. Tried the Split tool. 6. Trimmed part of the video. 7. Tapped Audio and added a sound. 8. Tapped Text and added a title. 9. Added a simple transition between two clips. 10. Pressed Play to preview my work. This practical exercise helped me understand the CapCut interface faster than simply looking at the different buttons and tools. E. Save/Export My Project When I finished editing: 1. I tapped the Export button in the top-right corner. 2. I chose my desired resolution, such as 1080p. 3. I selected the appropriate frame rate. 4. I tapped Export. 5. I waited for CapCut to finish processing the video. 6. After the export was complete, I saved the video to my device’s gallery. Conclusion By completing this exercise, I learned how to download and import media into CapCut, navigate the main sections of the interface, perform basic video edits, add audio and text, apply effects, use overlays, and export a completed video.
- Comprehensive exploration of CapCut features.
- Clear step-by-step instructions for downloading and using media.
- Effective demonstration of practical application of learned skills.
"Overall, the student provided an excellent submission that clearly outlines their process of exploring the CapCut interface and applying its features. With minor improvements in organization and personal reflection, this assignment could be even stronger."
3. CapCut Overview
Download the media and explore the CapCut interface using the files.
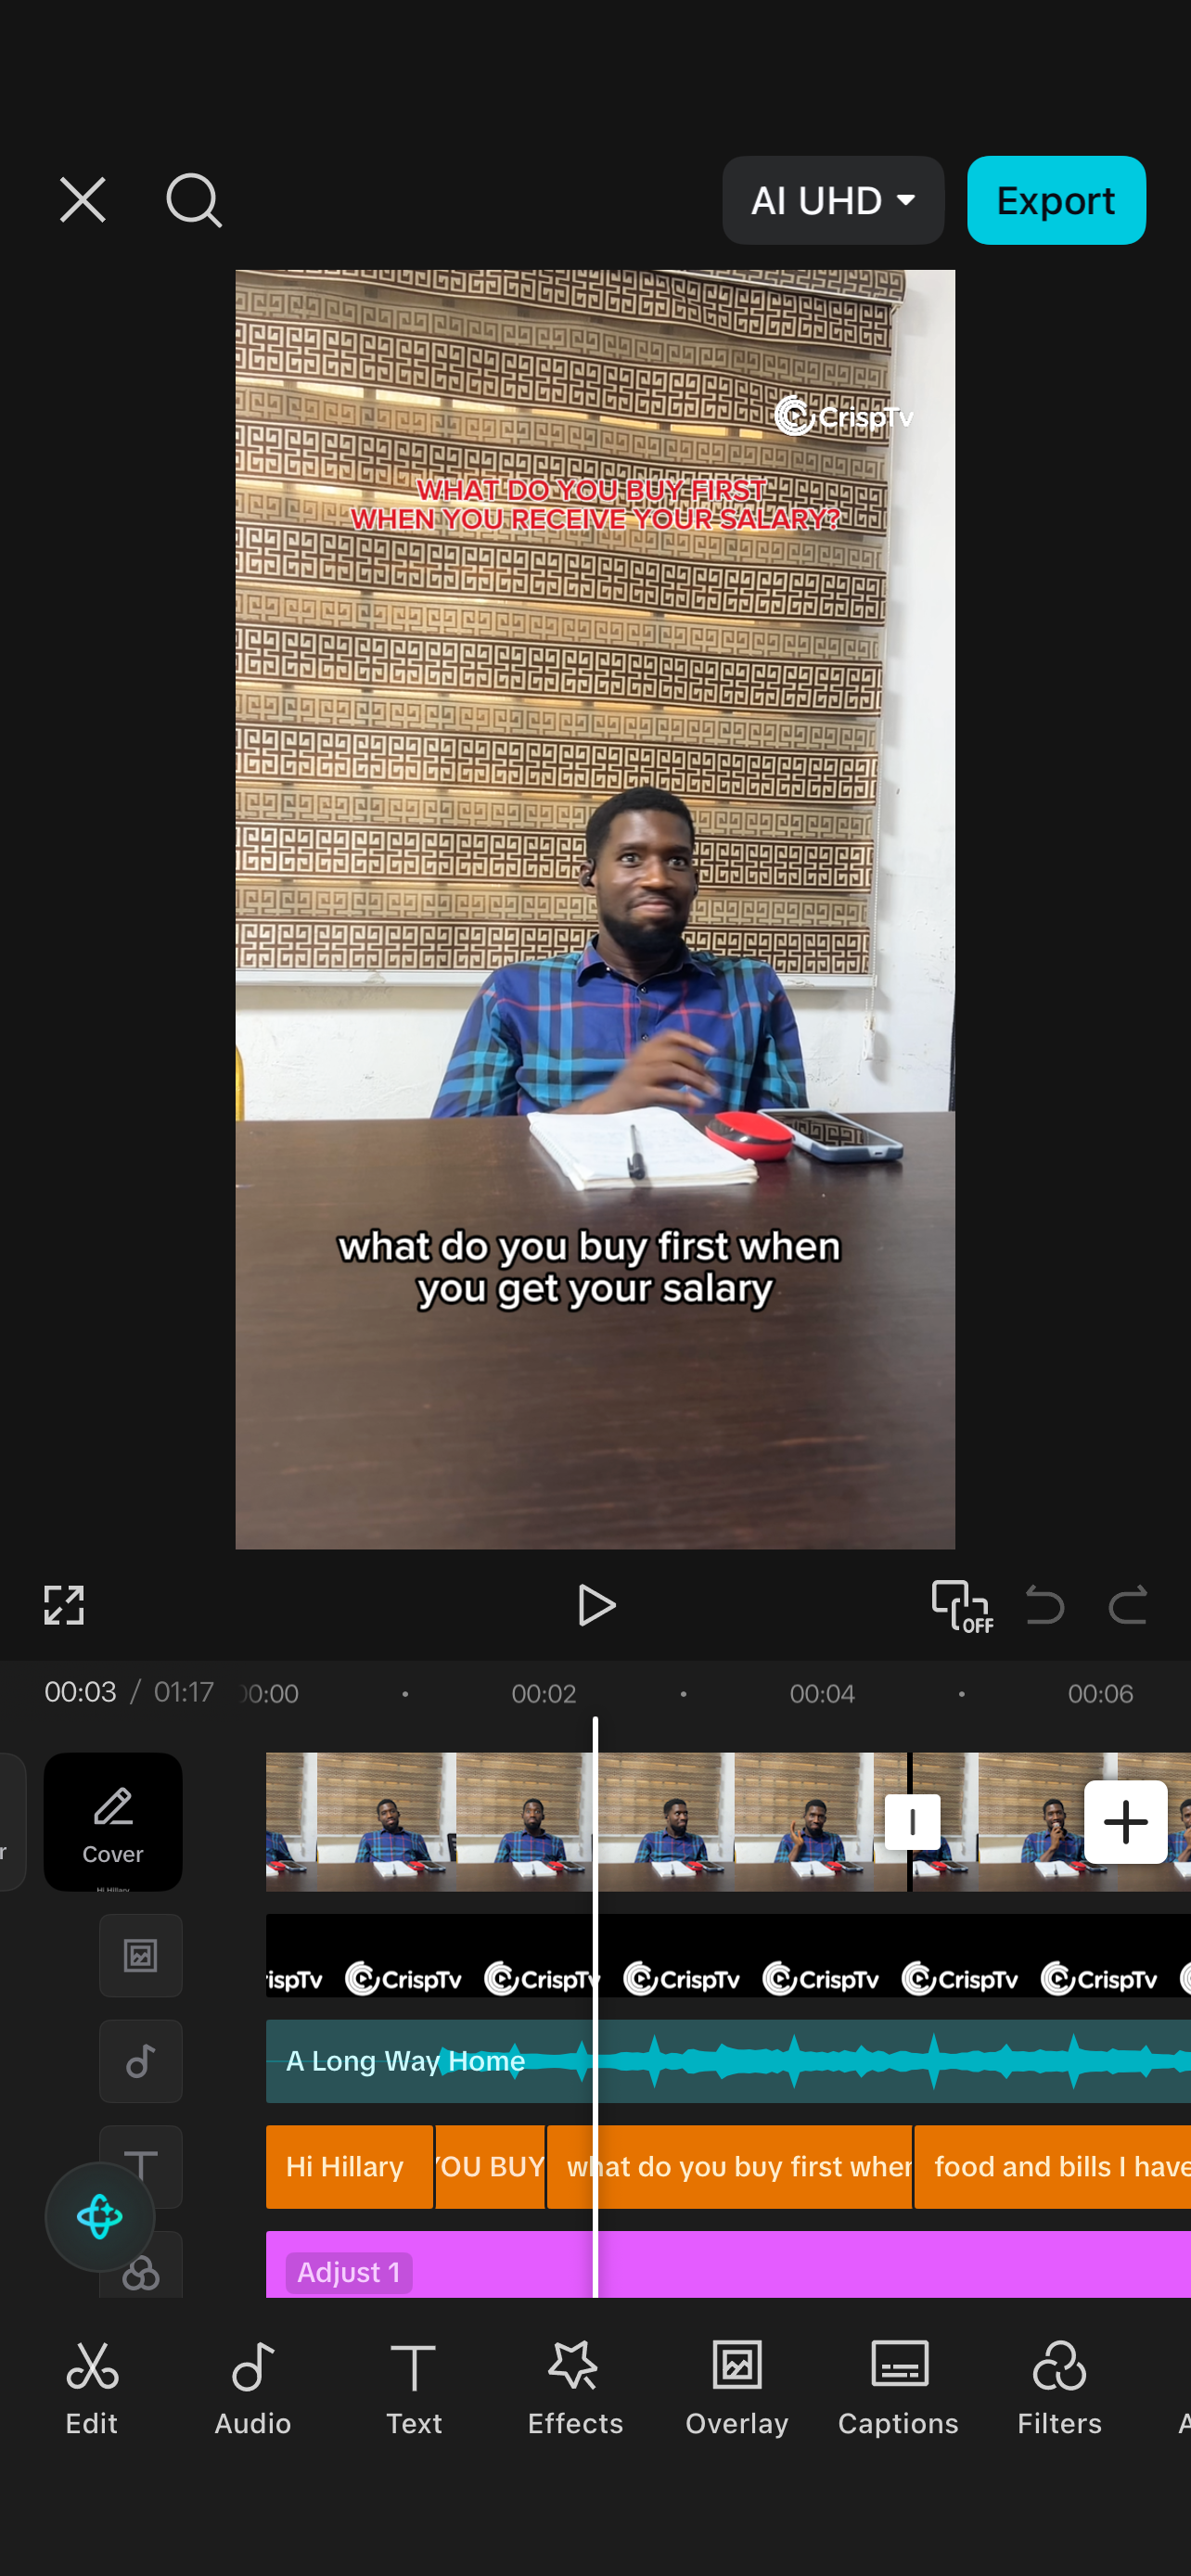
A. Download the Media Files 1. I opened the platform where the files were sent. 2. I located the video, images, and audio files I needed. 3. I tapped Download or Save to Device. 4. I made sure all the files had finished downloading before opening CapCut. B. Open CapCut 1. I opened the CapCut app. 2. On the home screen, I tapped New Project. 3. CapCut opened my device’s media library. 4. I selected the videos and images I had downloaded. 5. I tapped Add to import them into my project. C. Explore the CapCut Interface I explored the following sections of the CapCut interface: 1. Preview Window The Preview Window is the large area at the top of the interface. I: * Viewed my video in the Preview Window. * Tapped Play to preview my video. * Dragged through the video to check different moments. 2. Timeline The Timeline is the section underneath the Preview Window. It contains: * Video clips * Images * Audio/music * Text * Effects * Stickers I tapped a clip to select it and practiced moving, trimming, splitting, and editing it. 3. Editing Toolbar When I selected a video clip, I explored tools such as: * Split – cuts the clip into two sections. * Trim – shortens the beginning or end of a clip. * Speed – makes the video faster or slower. * Volume – adjusts the audio level. * Animation – adds entrance, exit, and motion effects. * Filters – changes the visual appearance of the video. * Adjust – allows me to change brightness, contrast, saturation, and other settings. * Delete – removes the selected clip. 4. Audio I tapped Audio to explore options for adding: * Music * Sound effects * Voiceovers * Sounds available on CapCut 5. Text I tapped Text to explore how to: * Add captions * Add titles * Change fonts * Change text colour * Add text animations * Create auto captions 6. Effects I tapped Effects to explore: * Video effects * Body effects * Other visual effects 7. Overlay I explored the Overlay feature, which allows me to place another video or image on top of my main video. I learned that overlays can be used for: * Logos * Watermarks * B-roll * Picture-in-picture videos D. Explore the Downloaded Media To practice using the CapCut interface, I: 1. Imported one video. 2. Imported one image. 3. Added both to the timeline. 4. Tapped the video to select it. 5. Tried the Split tool. 6. Trimmed part of the video. 7. Tapped Audio and added a sound. 8. Tapped Text and added a title. 9. Added a simple transition between two clips. 10. Pressed Play to preview my work. This practical exercise helped me understand the CapCut interface faster than simply looking at the different buttons and tools. E. Save/Export My Project When I finished editing: 1. I tapped the Export button in the top-right corner. 2. I chose my desired resolution, such as 1080p. 3. I selected the appropriate frame rate. 4. I tapped Export. 5. I waited for CapCut to finish processing the video. 6. After the export was complete, I saved the video to my device’s gallery. Conclusion By completing this exercise, I learned how to download and import media into CapCut, navigate the main sections of the interface, perform basic video edits, add audio and text, apply effects, use overlays, and export a completed video.
- Clear and organized steps for downloading and importing media.
- Thorough exploration of the CapCut interface.
- Effective use of editing techniques demonstrated.
"The student demonstrated a strong understanding of the CapCut interface and practical video editing techniques. The assignment was well-structured and informative, with minor areas for improvement in detail and reflection on the editing process."
4. CapCut Overview
Download the media and explore the CapCut interface using the files.
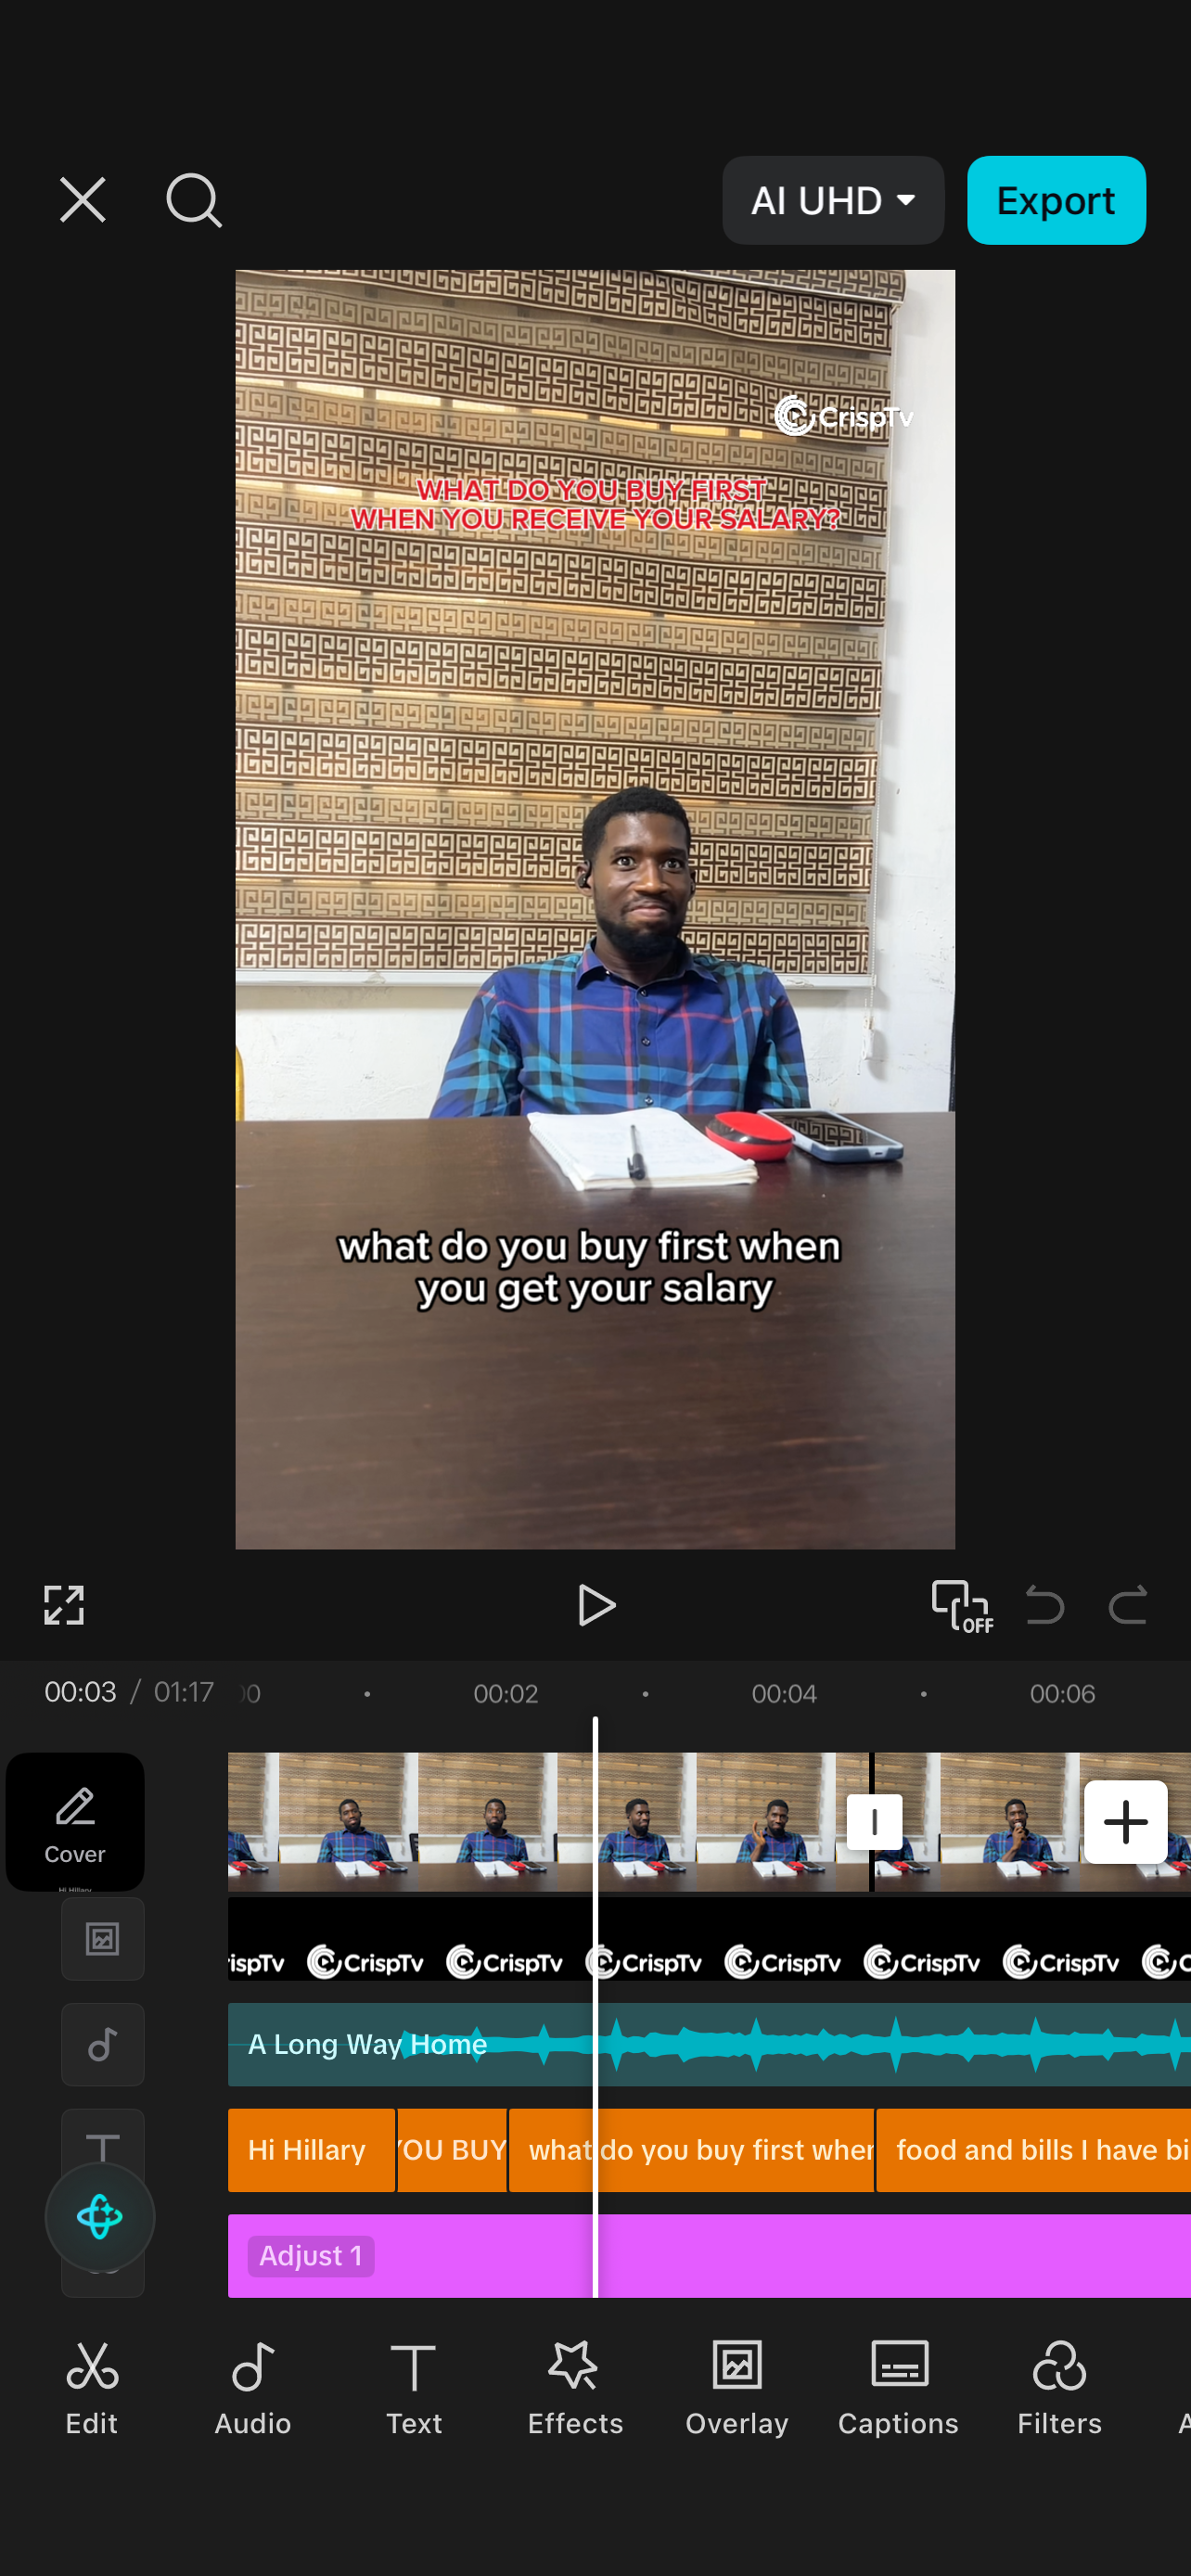
A. Download the Media Files 1. I opened the platform where the files were sent. 2. I located the video, images, and audio files I needed. 3. I tapped Download or Save to Device. 4. I made sure all the files had finished downloading before opening CapCut. B. Open CapCut 1. I opened the CapCut app. 2. On the home screen, I tapped New Project. 3. CapCut opened my device’s media library. 4. I selected the videos and images I had downloaded. 5. I tapped Add to import them into my project. C. Explore the CapCut Interface I explored the following sections of the CapCut interface: 1. Preview Window The Preview Window is the large area at the top of the interface. I: * Viewed my video in the Preview Window. * Tapped Play to preview my video. * Dragged through the video to check different moments. 2. Timeline The Timeline is the section underneath the Preview Window. It contains: * Video clips * Images * Audio/music * Text * Effects * Stickers I tapped a clip to select it and practiced moving, trimming, splitting, and editing it. 3. Editing Toolbar When I selected a video clip, I explored tools such as: * Split – cuts the clip into two sections. * Trim – shortens the beginning or end of a clip. * Speed – makes the video faster or slower. * Volume – adjusts the audio level. * Animation – adds entrance, exit, and motion effects. * Filters – changes the visual appearance of the video. * Adjust – allows me to change brightness, contrast, saturation, and other settings. * Delete – removes the selected clip. 4. Audio I tapped Audio to explore options for adding: * Music * Sound effects * Voiceovers * Sounds available on CapCut 5. Text I tapped Text to explore how to: * Add captions * Add titles * Change fonts * Change text colour * Add text animations * Create auto captions 6. Effects I tapped Effects to explore: * Video effects * Body effects * Other visual effects 7. Overlay I explored the Overlay feature, which allows me to place another video or image on top of my main video. I learned that overlays can be used for: * Logos * Watermarks * B-roll * Picture-in-picture videos D. Explore the Downloaded Media To practice using the CapCut interface, I: 1. Imported one video. 2. Imported one image. 3. Added both to the timeline. 4. Tapped the video to select it. 5. Tried the Split tool. 6. Trimmed part of the video. 7. Tapped Audio and added a sound. 8. Tapped Text and added a title. 9. Added a simple transition between two clips. 10. Pressed Play to preview my work. This practical exercise helped me understand the CapCut interface faster than simply looking at the different buttons and tools. E. Save/Export My Project When I finished editing: 1. I tapped the Export button in the top-right corner. 2. I chose my desired resolution, such as 1080p. 3. I selected the appropriate frame rate. 4. I tapped Export. 5. I waited for CapCut to finish processing the
- Clear and detailed step-by-step instructions.
- Demonstrated practical application of CapCut features.
- Good understanding of the interface and its functionalities.
"Overall, the student has performed excellently in this practical assignment, showcasing a strong understanding of both the downloading process and the CapCut interface. The detailed exploration of features and practical application indicates a solid grasp of the software. Minor improvements could be made by providing more examples and visuals to further enhance the submission."
5. CapCut Overview
Download the media and explore the CapCut interface using the files.
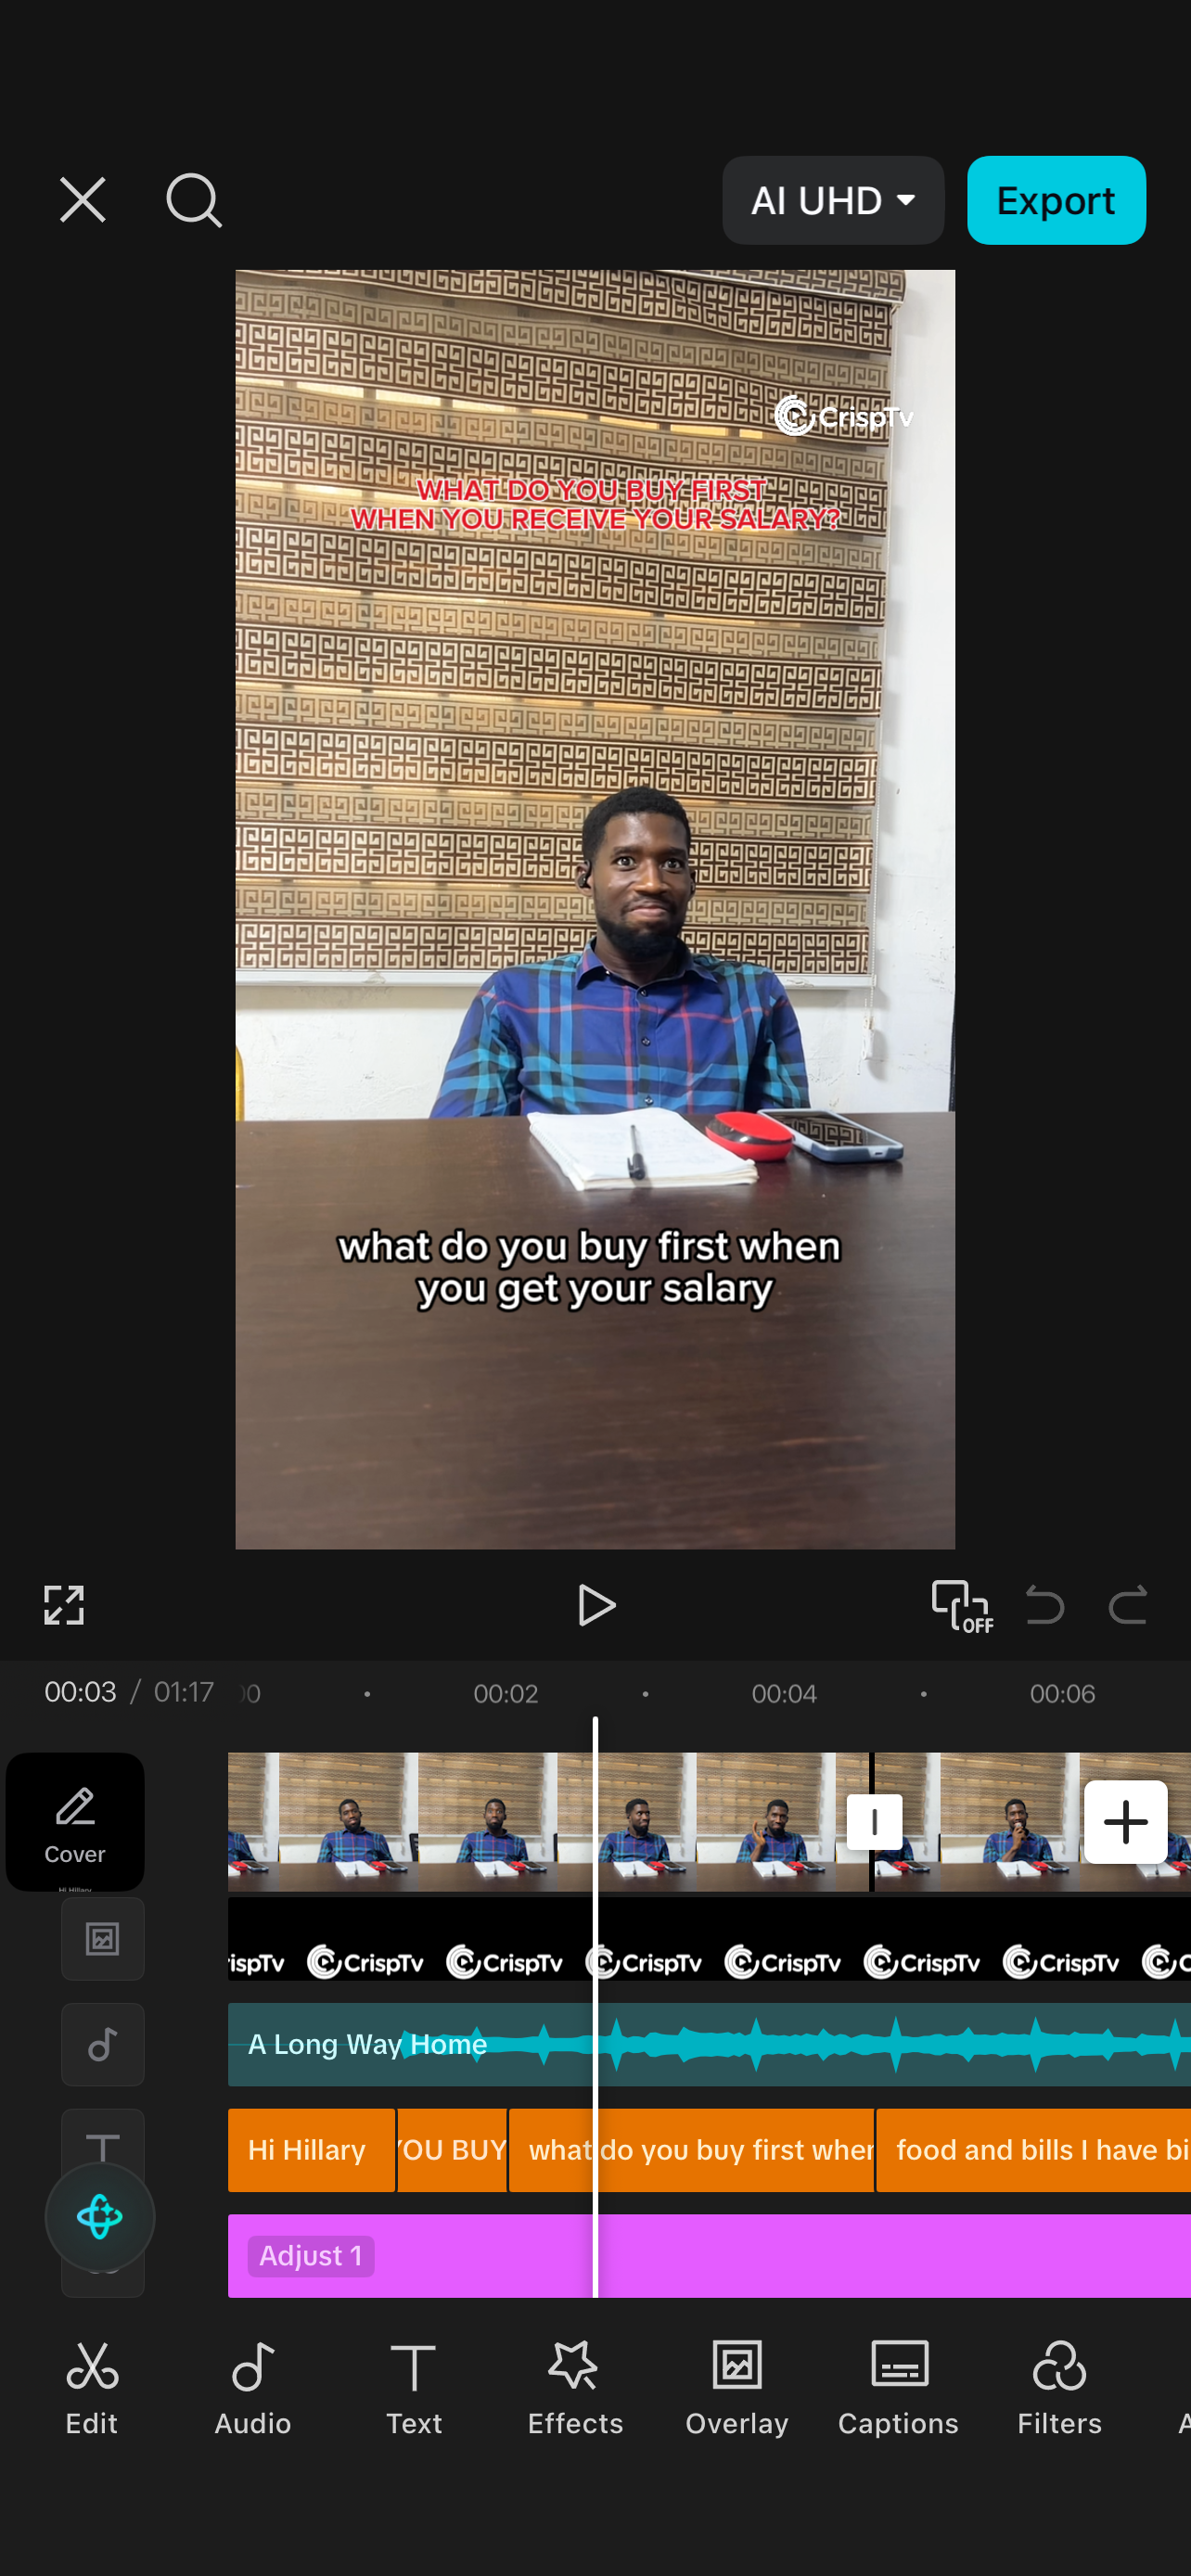
A. Download the media files 1. I opened the platform where the files were sent. 2. Located the video, images, and/or audio files I need. 3. Tapped Download or Save to device. 4. I made sure the files have finished downloading before opening CapCut. B. Open CapCut 1. I opened my CapCut app. 2. On the home screen, I tapped new project. 3.it opened my device’s media library. 4. I selected the videos/images i downloaded. 5. And tapped add. C. Explore the CapCut interface I explored 1. Preview Window This is the large area at the top. *Shows me what my video currently looks like. * Tapped play to preview my video. * i dragged through the video to check different moments. 2.Timeline This is the section underneath the preview. It contains my: * Video clips * Images * Audio/music * Text * Effects * Stickers I tapped a clip to select it and then move, trim, split, or edit it. 3. Editing Toolbar When i selected a video clip, thats where i saw tools such as: * Split – cuts the clip into two sections. * Trim – shortens the beginning or end. * Speed – makes the video faster or slower. * Volume – adjusts the audio. * Animation – adds entrance/exit/motion effects. * Filters – changes the visual appearance. * Adjust – lets you change brightness, contrast, saturation, etc. * Delete – removes the selected clip. 4.Audio I tapped Audio to add: * Music * Sound effects * Voiceovers * Sounds from CapCut 5. Text I tapped Text to: * Add captions * Add titles * Change fonts * Change text colour * Add text animations * Create auto captions 6. Effects I tapped Effects to explore: * Video effects * Body effects * Transitions and other visual effects 7. Overlay It allows me to place another video or image on top of my main video. For example, i can use it for: * Logos * Watermarks * B-roll * Picture-in-picture videos D. Explore the media i downloaded 1. I imported one video. 2. Imported one image. 3. Added both to the timeline. 4. Tapped the video. 5. Tried Splitting. 6. Trimmed part of the video. 7. Tapped Audio and added a sound. 8. Tapped Text and added a title. 9. Added a simple transition between two clips. 10. Press Play to preview my work. It helped me understand the interface much faster than simply looking at the buttons 5. Save/export my project When i finished: 1. I tapped the Export button in the top-right corner. 2. Choose my desired resolution, such as 1080p. 3. Selected my frame rate as required. 4. Tapped Export. 5. Waited for CapCut to finish processing. 6. After it finished, I saved my video to my device’s gallery.
- Thorough understanding of the CapCut interface.
- Clear and organized steps for each part of the assignment.
- Effective use of terminology related to video editing.
"Overall, the student demonstrated a strong grasp of the CapCut interface and effectively completed the assignment. The detailed exploration of features and functionalities was commendable, though minor improvements in clarity and detail could enhance future submissions."